Install the BUCS Remote Agent
Recommended System Requirements
-
16 GB of RAM
-
4 CPUs
- Install on a dedicated server, not a personal computer. The agent must run continuously; installing it on a user's workstation would cause it to stop whenever that computer is turned off or disconnected.
How to install the BUCS Remote Agent
⚠️ Prior to installation, make sure your BUCS user has the Agent Manager or Connection Manager role enabled so you can generate the Authorization Key needed to setup the remote agent. You will also need administrator access to:
Access the server where the data source is located
Install the BUCS Remote Agent
Authorize set up of a new user with read-only access to the data source
Reminder: You can install multiple agents, but you can only install one agent per server or host. Make sure the agent is installed where the data source you want to import is accessible.
1. Download the BUCS Remote Agent
Click the download link the BUCS team provided to download the Remote Agent on the machine where it will be installed
OR
Click here to access the BUCS agent download link. Use the 64-bit Installer unless BUCS has specified you need the 32-bit Installer.
2. Initiate the install
Double click the installer to initiate the installation process.
![]()
3. Proceed within the setup wizard
Click Next to proceed in the setup wizard.

4. Accept terms of service
Read the BUCS Terms of Service. Select Accept then click Next.

5. Install the Agent
Click Install button to start the installation process.

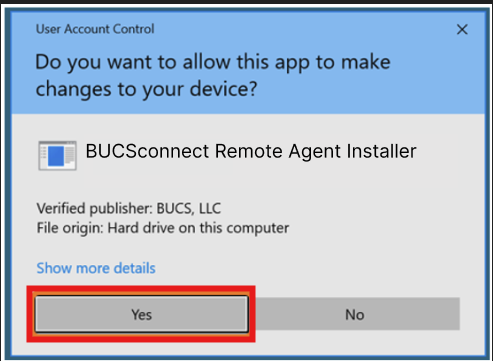
Windows may ask if you are sure you want to allow the BUCS agent to make changes. Click Yes to give permission to install the program.

6. Obtain authorization information
Navigate to the BUCS Customer Portal > Agent Management and click Generate New Key.
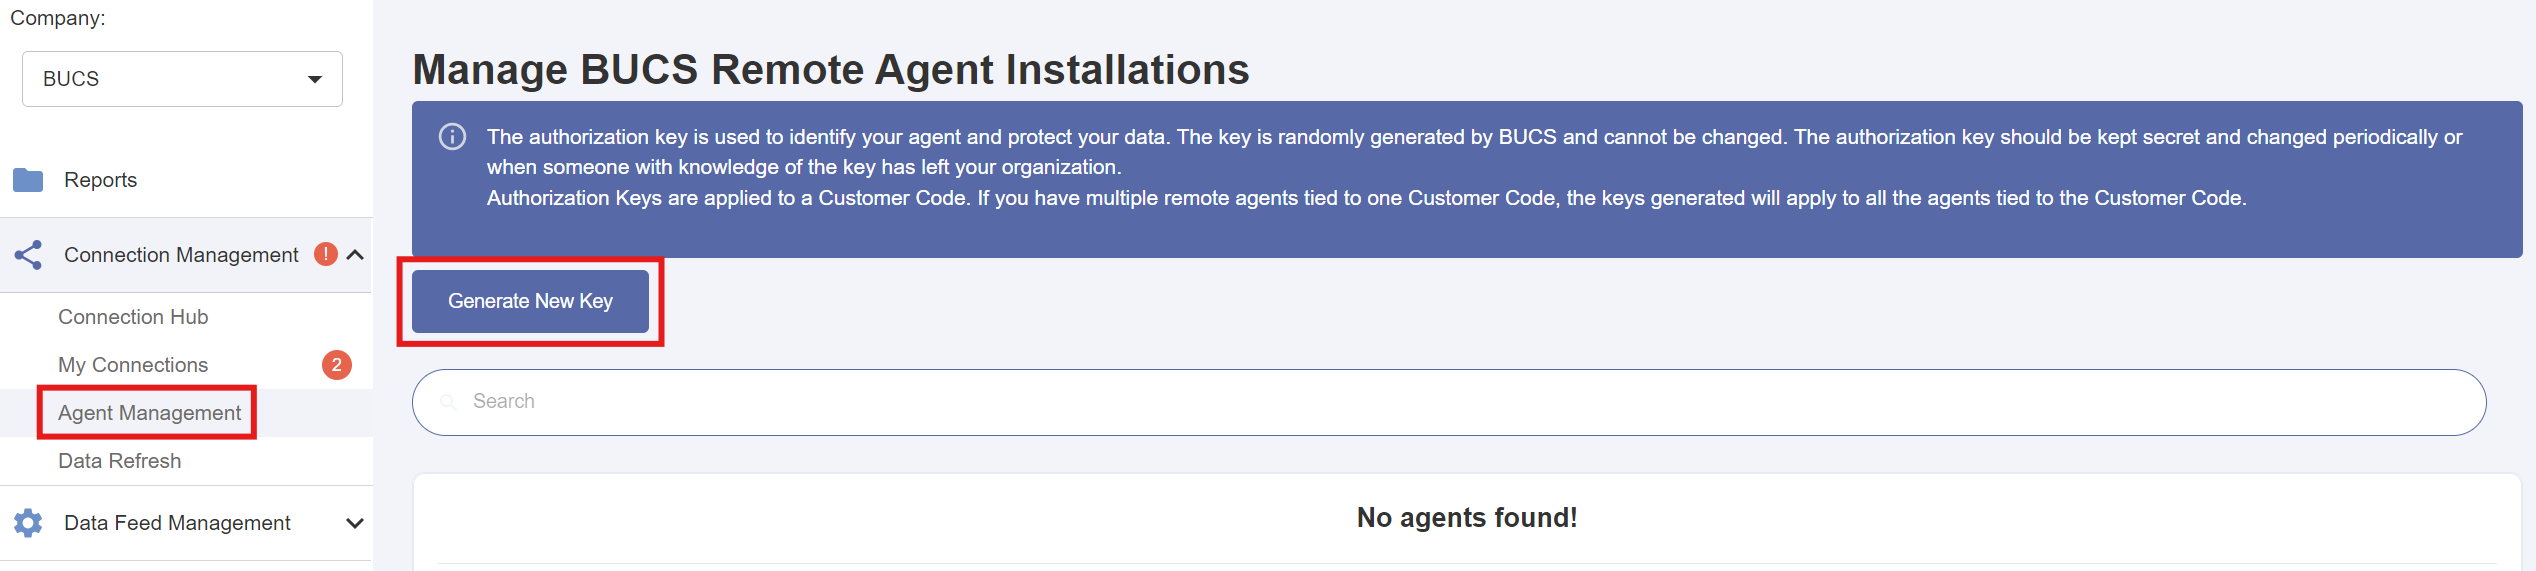
Follow the prompts and copy the Authorization Key and Customer Code which you will enter in the Remote Agent Configurer App in the next step.
⚠️ The Customer Code will always be formatted as "BC_" followed by a string of capitalized letters.


7. Provide authorization information
Windows may ask if you are sure you want to allow the BUCS agent to make changes. Click Yes to allow the application to run.
Enter the Authorization Key and Customer Code and Location Name in the Configurer App window that appears. You can right click or ctrl+V to paste the values in the appropriate fields. Click Save then Quit.

8. Finish install
Click Finish in the setup wizard.

Notify the BUCS team to let them know the BUCS Remote Agent installation is complete.