There may be fees associated with setting up a new data connection. Please contact your account team to confirm pricing.
Pre-Implementation
To establish the connection, you will need the BUCS Remote Agent installed on the machine where your QuickBooks Enterprise files are located. Remote Agent installation instructions can be accessed here.
Implementation
1. Connect to QuickBooks Enterprise
Go to BUCS Customer Portal > Connection Management > Connection Hub. Locate or search for the QuickBooks Enterprise connector and click Connect.
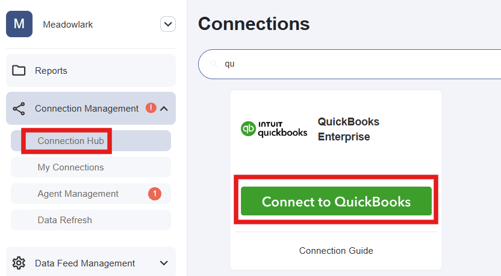
![]() If you see this screen, follow the instructions to download the BUCS Remote Agent before you can proceed to step 2.
If you see this screen, follow the instructions to download the BUCS Remote Agent before you can proceed to step 2.

2. Name Connection
Enter a Name for your connection on the first page of the connection wizard and then click Next. The connection name should be descriptive and specific to the connection you want to establish.

3. Provide Connection Details
Provide the File Path to the QuickBooks Enterprise data file and your QuickBooks Enterprise Username and Password. Click Save. The Username and Password can be associated to an existing user or you can setup a new dedicated BUCS user in your QuickBooks Enterprise account.

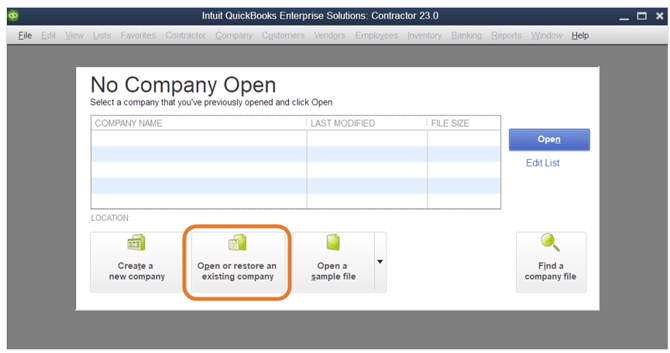
1. Open the QuickBooks Desktop app on the server where the BUCS Remote Agent is installed. Select Open or restore an existing company.


[Folder path] is the location you copied in step 4 and [Company File name] is the name of the file you right clicked in step 3.

4. Connection Established
If the connection was established successfully, you will see a Connection Established message and data from QuickBooks Enterprise will continuously sync to BUCS. If the connection was not successful, you will be asked to try again.
NOTE: If you don't see your QuickBooks Enterprise data appear in the BUCS platform in 24 hours, please contact your account team.
Troubleshooting Guidance
- Ensure you have the correct file path.
-
Important: Do not use mapped drives (e.g.,
G:\QBE) in configuration files or application settings.Steps:
-
Open Windows Explorer.
-
Navigate to the mapped drive (e.g.,
G:). -
In the left-hand navigation panel, right-click on the mapped drive.
-
Note the UNC path shown in parentheses (e.g.,
G: (\\bucs-remote-1\G)). -
Navigate to the target folder and copy the full UNC path (e.g.,
\\bucs-remote-1\G\BUCS\Client QB Files). -
Use this UNC path in the
.NDfile or any system configuration—never use mapped drive letters.
-
-
- Ensure BUCS Agent Runs Under a Domain User Account
-
By default, the BUCS Agent runs under a local account, which may lack access to network resources. This must be changed to a valid domain account.
Steps:
-
Open up windows services in the Start menu
-
Locate the service named “BUCSconnect Remote Agent Properties".
-
Right-click and select Properties.
-
Navigate to the "Log On" tab.
-
Select the radio button labeled "This account".
-
Click "Browse...".
-
In the "Select User" window:
-
Click "Locations...", select the entire domain, and click OK.
-
In the input field, begin typing the username of the domain account used to install the agent.
-
Click "Check Names". If resolved correctly, the name will underline.
-
Click OK.
-
-
Enter and confirm the password for the selected user.
-
Click Apply and then OK.
-
Restart the Bucs Agent service.
-
-
- If you have recently upgraded QuickBooks and were/are using single user mode, and your connection shows as Disconnected/Disabled, follow these quick steps:
- Switch to Multi-user Mode
- Click Yes in "Multi-user hosting setup required" pop up
- Click Continue in Administrator Permissions Needed pop up
- Click OK in "Set up multiple users" popup
- Switch back to Single-user Mode
- This should restart the QuickBooks database engine and get your connection back up. Contact your CS representative to confirm.
- Switch to Multi-user Mode